Hosted by the  .
.
-
-
Xecuter X3 XBOX Modchip BIOS User's Manual
X3 BIOS General XBOX Settings Screen
This section
covers the general settings that are available via the X3 BIOS. You can adjust
just about everything here the original dashboard could and more except for game saves.
- Index
<< EEPROM Tools Screen
Hardware Info Screen >>
- Contents:
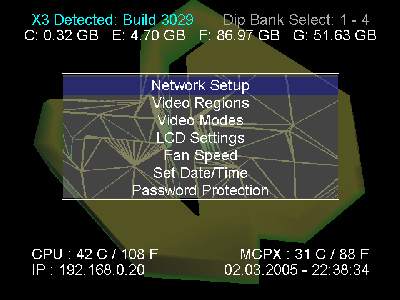
- Network Setup
- Video Regions
- Video Modes
- LCD Settings
- Fan Speed
- Set Date/Time
- Password Protection
-
- General XBOX Settings Screen:
-
- Network Setup: Before you bother with these
settings you must have some sort of network and your XBOX connected to it. More
information: Homenetworking Connection,
Using Your Broadband Network with Xbox Live, or
Networking your XBOX.
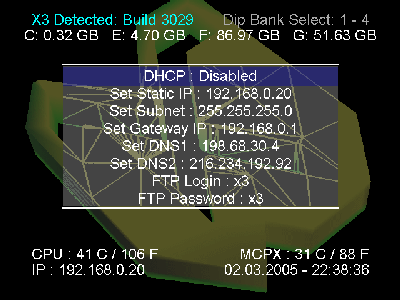
- DHCP: "Dynamic Host Configuration Protocol" is just a fancy way of
saying that the IP address a network device (Xbox or Computer) requires to talk
to other computers is assigned automatically by a computer, router, or DHCP
server on the network configured to Assign DHCP addresses. If you have DHCP
running on the router you are connecting your XBOX to, then DHCP may be preferred
by you. However, I always set a Static IP. Disable this to enable the rest of
the fields.
- Set Static IP: A static IP should be similiar to the IP address of
the another computer or router on the network, but cannot be the exact same. If
your computer's LAN IP address is 192.168.0.2, then your XBOX could be 192.168.0.3
as long as no other device on your network already has that address.
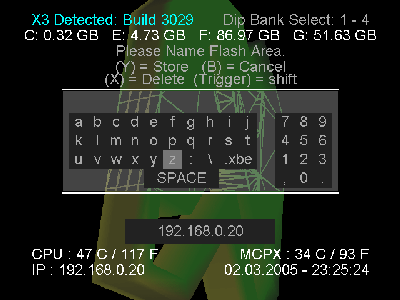
- When entering in an IP address be very careful to make sure that those are
dots "." between the numbers like in the screenshot, and not commas "," which may
look similiar on some TVs. The dot is in the bottom right of the virtual onscreen
keyboard.
- Set Subnet: This should be the exact same as the subnet mask on the
router or other computer on the same network. 255.255.255.0 is what I use.
- Set Gateway IP: This is the IP address of the router or computer
that the XBOX has to "go through" to get to the internet. For me, I have a
router and it's IP address is 192.168.0.1. This may or may not be true for you
depending on how you are setup.
- Set DNS1: Domain Name System (No it isn't Domain Name Service). The
DNS is the public IP address of a server on the internet that literally takes a
query or request providing a name such as bustedchain.com and turning it into an
IP address that a computer can connect to. Put in the IP address of the DNS your
ISP uses, or see if you can use your friend's DNS. (Many ISPs don't care if a few
non-customers use their DNS server.)
- Set DNS2: There is usually a backup DNS IP address, so put it here.
If you can't get a second one, don't worry about it.
- FTP Login / FTP Password: The login and password are hardset. I wish
Team Xecuter would let users change this setting so I could secure my XBOX a
little better.
-
- Video Regions: Selecting the wrong Video
Region can really cause you problems. For one, if your TV can't display the
signal, then you'll have to change the setting back to NTSC U "by braille" or
by feel. (Or reflash your Main BIOS). Leave it alone unless you know that your
TV supports the different format.
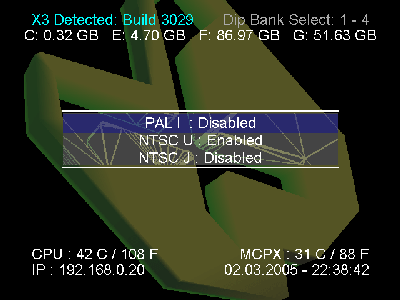
- PAL I: European TVs
- NTSC U: Unites States TVs
- NTSC J: Japan TVs
-
- Video Modes: These modes are various degrees
of "Higher Definition" the only TRUE High Definition is 1080i, however the other
two are higher resolution than regular signals. You must have a HDTV video adapter
for your XBOX before any of this matters to you. Some TVs are smarter than
others and can "upconvert" the wrong signal, however you might run into the same
problem as the last topic "Video Regions" by messing around here. Make sure that
your TV supports the mode(s) you enable.
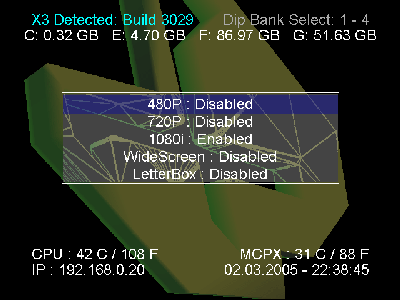
- 480P: 480 pixels wide signal type
- 720P: 720 pixels wide signal type
- 1080i: 1080? pixels wide signal type
- WideScreen: If your TV screen is the standard shape, then leave this
off. If you have a plasma screen or some other TV with a "widescreen" profile
then turn this on and see if it looks better to you.
- LetterBox: Another widescreen format alternative.
-
- LCD Settings: The X3 Modchip has a port on it to
plug in a small LCD screen which can be installed on your XBOX. These settings are for that device.
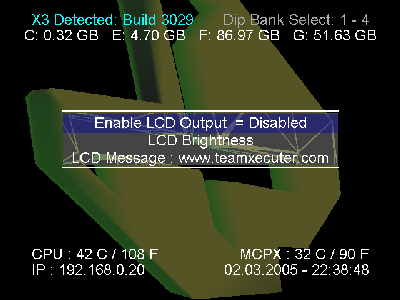
- Enable LCD Output: Leave this disabled if you don't have an LCD
screen connected to your X3 Modchip.
- LCD Brightness: You can adjust the brightness of the screen here.
- LCD Message: You can change the message here using the standard
virtual onscreen keyboard.
-
- Fan Speed: This setting controls the speed of the
Fan in your XBOX when you are running the X3 BIOS itself. When you are in other
applications, other settings in those programs control the fan speed. If you
think the fan is too noisy then leave your XBOX off all the time. The fan is
required to keep your XBOX's processors and other components cool. If they
overheat you could run into big problems like your XBOX shutting down by itself
or worse. (Temperature Information)
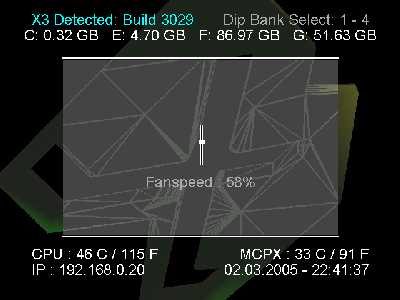
- Fan Speed: This slider moves up and down with the D-Pad or Left
Thumbstick control on your controller. %50 is good enough unless you see your
temperatures climbing too high according to: Temperature Information.
- PSA: Hey NUMBNUT! Yes You! The guy with the XBOX trapped in a closed
cabinet! DON'T DO THAT! HEAT KILLS COMPUTERS. If your XBOX cannot get "fresh
air" it will overheat and shut down at the least. In the worst case your XBOX
will fry itself and then you'll be left with a black plastic brick (possibly
melted). I have my XBOX in an entertainment center. I cut a nice big hole about
3/4's the height and 3/4's the width of the xbox in the back panel to allow
pleanty of air in there. When I play, I leave the front glass open 2 inches too.
-
- Set Date/Time: You can change the date and
time set in the XBOX through here.
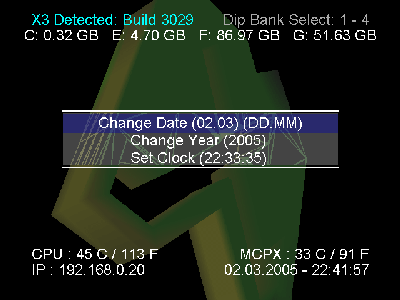
Set Date/Time Screen
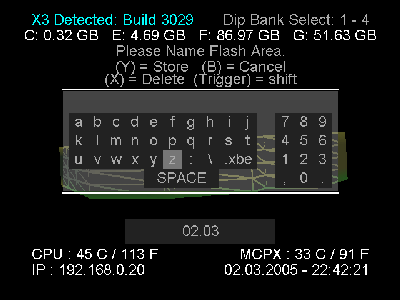
Date Format: DD.MM (02.03 is March 2nd)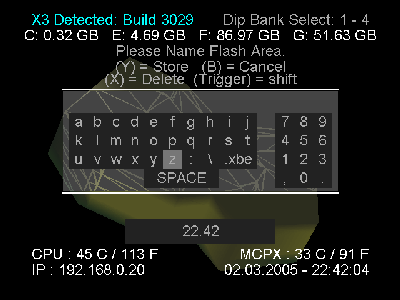
Time Format: HH.MM (22.42 is 10:42pm military time.)-
- Change Date (DD.MM): The date format above is DD.MM meaning two day-digits, a period, and two month digits. 15.02 is February 15th.
- Change Year (XXXX): The year format is standard 4 digit format: 2005
- Set Clock (HH.MM): The clock format is two hour digits, a period, and two minute digits. 12.00 is 12:00PM while 18.00 is 6:00PM.
- Notice the guide at the top of the screen? Press "Y" when you are done
typing the time. If you make a mistake use "X". To quit the keyboard editor
without saving changes, press "B".
-
- Password Protection: Your X3 BIOS can be
password protected to keep other people from getting in there and messing with
your XBOX if you have anyone around that would do something like that. Leave
it off unless you must have it, otherwise if you forget your password you will
have to reflash your BIOS.
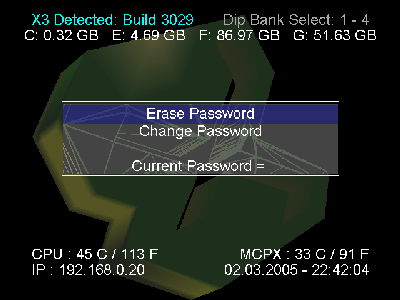
- Erase Password: Click here to remove the password you set using
"Change Password:" before.
- Change Password: Click here to enter a new password to keep people
out of the X3 BIOS configuration screens.
- Current Password: This just displays what your current password is.
Don't go to the "Password" screen if you have people around you don't wnat to
have the password.
-
- Index
<< EEPROM Tools Screen
Hardware Info Screen >>
Copyright ©2005 Tor Nichols. All Rights Reserved.


