Hosted by the  .
.
-
-
Xecuter X3 XBOX Modchip BIOS User's Manual
X3 BIOS Disk Tools Screen
This section
covers the Disk Tools screen functions and features. The X3 BIOS has built in
functions that will let you install a new and bigger harddrive in the XBOX.
- Index
<< BIOS Tools Screen
EEPROM Tools Screen >>
- Contents:
- Current Hard Drive Setup
- New Hard Drive Upgrade
-
- If you want to install your own hard drive it is almost as easy as taking
out the old drive and putting the newer larger one in, except some hard drives
aren't lockable. Here is a database for which hard drives tend to lock more
often than others:
XBOX Hard Drive Compatibility Chart (site was down as of writing this page).
Be sure to select an ATA100 or ATA133 drive. SATA is incompatible.
-
- Disk Tools Screen:
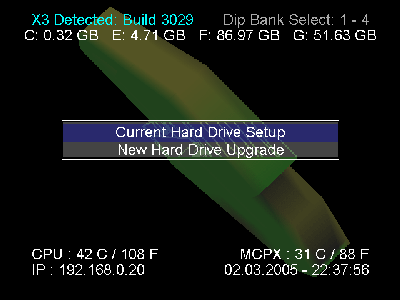
- The following screen is used to configure your currently installed hard drive
and setup/format a freshly installed hard drive.

-
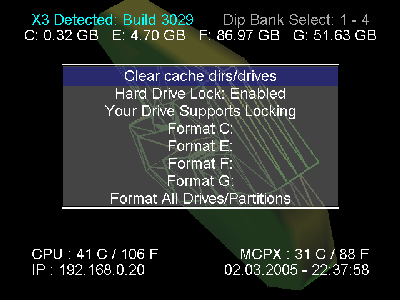
- Current Hard Drive Setup: Click this to
update the current hard drive setup parameters. This is used to unlock/lock the
harddrive, locking support status, and format the partitions.

- Clear Cache Dirs/Drives: Click here to clear the cached game
information and drives. Games and applications copy some information to the
harddrive to increase performance.
- Hard Drive Lock: Enable this to lock the harddrive put it into its
normal "encrypted" state. This is good for connecting to booting with the
original XBOX dashboard and XBOX Live.
- Locking Support Status: Look here to see if your currently installed
harddrvive can be "locked" and booted by the regular XBOX bios.
- Format A Single Partition: Select "Format C:", "Format E:", etc. to
wipe out everything on that drive/partition. Only do this if you are sure.
- Format All Drives/Partitions: Click here to format all hard drives
and partitions on those drives. This is a fast way to format all parts of a new
drive.
- Don't see a partition here you were expecting on a new drive? Make sure that
you have have enabled the proper LBA 48 mode in the
Customize X3 BIOS of the
X3 Config Live Screen.
-
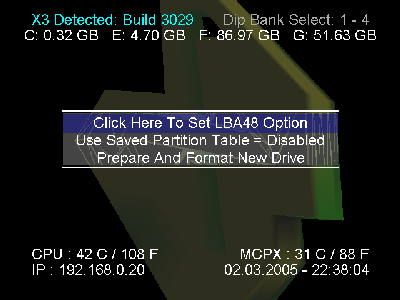
- New Hard Drive Upgrade: Click this to upgrade
your freshly installed hard drive, setting the LBA option, and prepare/format it.

-
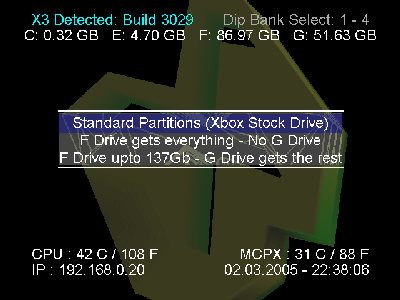
- Click Here To Set LBA48 Option: See the following screen.

Standard Partitions (Xbox Stock Drive): Select this to support factory 8GB harddrives.
F Drive Gets Everything - No G Drive: Select this to support drives under 160GB.
F Drive Upto 137Gb - G Drive gets the rest: Select this to support 160GB drives and larger.
-
- Use Saved Partition Table: Enable this if you have the partition
table information saved and can use it. I'm not sure about this feature. I
leave it disabled and setup my partitions using the LBA48 Option defaults.
-
- Prepare And Format New Drive: Click this option to have the X3
prepare the partitions and format them on your new hard drive. This formats
all partitions at once.
-
- Index
<< BIOS Tools Screen
EEPROM Tools Screen >>
Copyright ©2005 Tor Nichols. All Rights Reserved.


