Hosted by the  .
.
-
-
Xecuter X3 XBOX Modchip BIOS User's Manual
X3 Config Live Screen
This section
covers the X3 Config Live screen features and functions.
- Index
<< Main BIOS Screen
BIOS Tools Screen >>
- Contents:
- Customize X3 BIOS
- Customize XBOX Logo Colors
- Customize Flubber Colors
- Other Startup Tweaks
- X3CL Skins
- Quicklaunch
- Reset X3 Configuration To Defaults
- Reboot With X3 Disabled
-
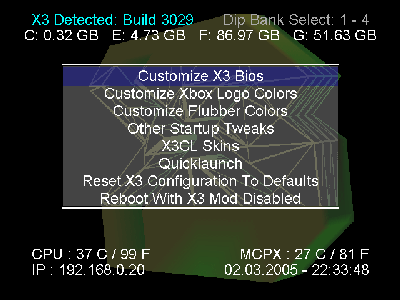
- X3 Config Live Screen:
- The following screen is used to configure BIOS options, custom boot logo
colors, startup options, select and/or download new X3 skins, setup application
quicklaunch functions, restore defaults, or reset with the X3 Modchip disabled.
-
- Customize X3 BIOS: This option brings up a new screen the following options:
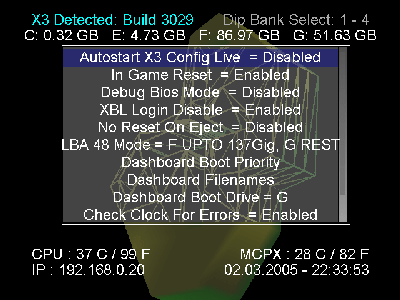
- Autostart X3 Live: If this option is disabled you will have to hold
down the white button on the controller during bootup to get back into
these bios screens. The X3 BIOS will immediately load your selected dashboard.
Most users should disable this when they are done setting up and configuring
their BIOS so that bootup is faster.
- In Game Reset: If this option is enabled, you can press Left Trigger,
Right Trigger, Back Button, and Start Button together to reboot your XBOX from
the dashboard or a game.
- Debug BIOS Mode: Leave this option disabled unless directed by a
technician. Disabled = Retail Mode.
- XBL Login Disable: (XBOX Live Login Disable) Enable this option to
let your X3 BIOS keep you from accidentally trying to log into XBOX Live games.
If you login to XBOX Live with your modchip enabled, it is quite likely and
possible that you will be banned. Check out XLink Kai for online gaming using tunneling software to join
LAN games across the internet.
- No Reset On Eject: Enable this option to keep your XBOX from
rebooting when you eject the disc during a game.
- LBA 48 Mode: Logical Block Addressing 48 Mode lets your XBOX use
huge harddrives. This mode has three options:
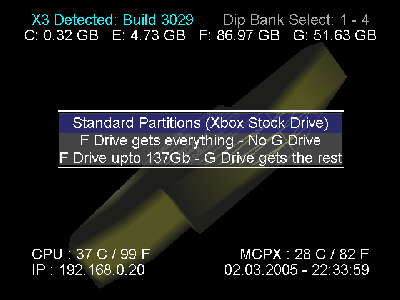
Standard Partitions (Xbox Stock Drive): Select this to support factory 8GB harddrives.
F Drive Gets Everything - No G Drive: Select this to support drives under 160GB.
F Drive Upto 137Gb - G Drive gets the rest: Select this to support 160GB drives and larger.
-
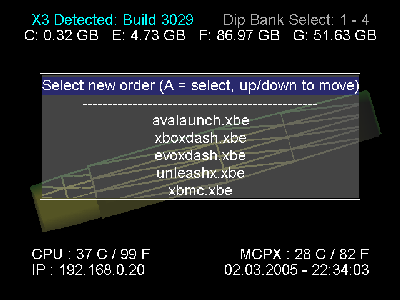
- Dashboard Boot Priority: This option is used to specify which order
dashboards are booted in. Click this option and on the next screen press "A"
after selecting the dashboard you want. I highly recommend using
Avalaunch or XBMC for having the most
features. (You have to download and install the dashboard before it will bootup.)
-
-
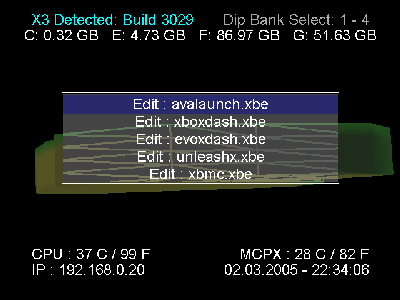
- Dashboard Filenames: If you have changed the name of the dashboard
you installed, you can modify the names the X3 looks for here by pressing "A"
after selecting the initial name.
-
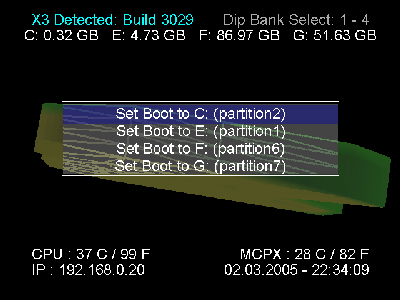
- Dashboard Boot Drive: Select the drive to which you installed your
dashboards. C:, E:, or if your Hard Drive is big enough F: is recommended. (If
you have a stock/factory harddrive, you will not have F: and G:.)
-
- Check Clock For Errors: With this option enabled, the X3 BIOS will
check the internal XBOX clock to make sure it isn't messed up. Some problems
have occurred in the past with other setups, but I'm not aware of any with the
X3.
-
- Customize XBOX Logo Colors: The colors of the XBOX logo displayed at bootup can be changed:
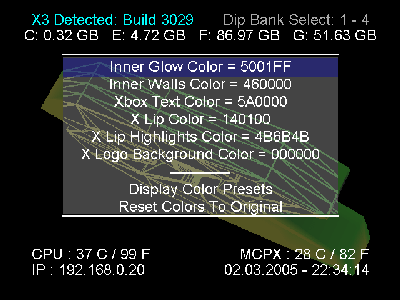
- Change A Color Manually: Change a color manually by clicking on the
menu item from Inner Glow Color to X Logo Background Color and adjusting the
three sliders seen below:
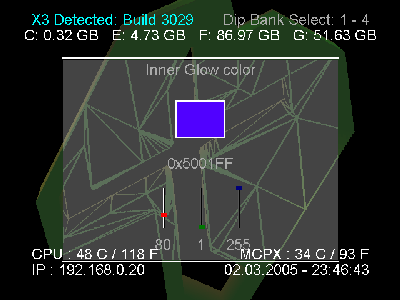
- Move the D-Pad left or right to select a color channel and move the pad up
or down to add more of that color or take it away.
-
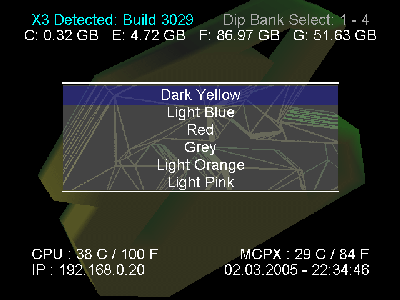
- Select a Color Preset: Select from a list of color presets by
clicking on "Display Color Presets":
-
- Customize Flubber Colors: The colors of the "Flubber" or lava blobs
in the XBOX animation at bootup are configurable here by manually adjusting the
Red/Green/Blue colors or by selecting from a list of preset colors available in
the BIOS. See the previous section on Customizing the XBOX Logo Colors because
the same information applies.
-
- Other Startup Tweaks: You can change some of the startup options here.
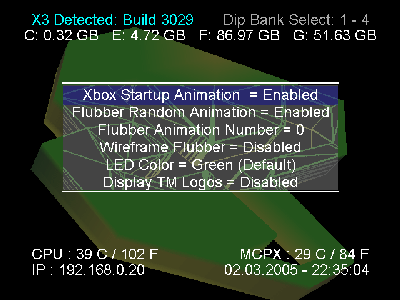
- XBOX Startup Animation: Disable this option to decrease the time it
takes your XBOX to boot. This overrides any custom colors you pick as the
animation will not be displayed.
- Flubber Animation Random: Enable this option to keep from seeing the
exact same flubber animation over and over again. You will get slightly different
effects each time; mainly camera angle.
- Flubber Animation Number: Use this option to select a specific
flubber animation to use. Disable the random flubber feature if you use this.
- Wireframe Flubber: Enable this option if you want to see the flubber
animation without the skin on it. You will see the geometries that were used to
create the animation.
- LED Color: Select a default LED color for the light that is around your
Eject button. Other options include "Cycle" which cycles through all the colors,
"Green", "Red", "Orange", and "Off".
- Display TM Logos: Enable or Disable the little TM logo next to the XBOX logo on bootup.
-
- X3CL Skins: Click here to select a new skin for your X3 BIOS. This
changes the look of all the screens you have seen in all these screenshots. You
need a network connection to your XBOX download new skins. There are a couple
that came with the BIOS.
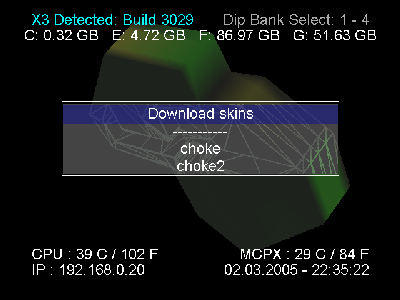
- To change your skin, click on one of the skins on the bottom of this list.
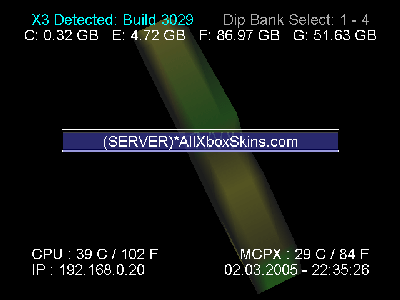
To download a new skin from the skins server, click "Download Skins". Move the
D-Pad around to select different skins or browse a different Server labeled with
the (Server) tag next to it.) When you want to switch to a skin, click on it.
-
- If you selected a skin and for any reason wanted to go back to the default
"look", you need to FTP to your XBOX and delete the file E:\x3skins\selected.
Perhaps Team Xecuter will eventually provide a programatic way to go to the
default skin without having to FTP to your XBOX.
-
- Quicklaunch: Click here to specify which application loads when you hold
down the trigger during bootup to launch your favorite applications.
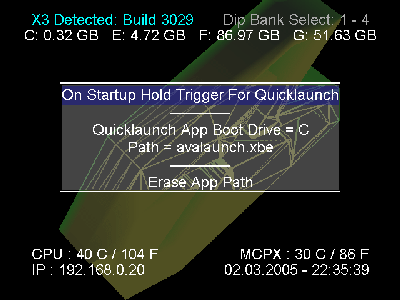
- Select the drive your application is on from the "Quicklaunch App Boot Drive" menu.
- Browse to the path the .xbe file for your application is located in and
click on the file you want to load.
Or, click "Erase App Path" to get rid of the quicklaunch setup.
-
- Reset X3 Configuration To Defaults: Click here to restore your X3
BIOS settings to factory default. Only do so if you are completely certain
because you cannot go back once you answer "Yes".
-
- Reboot With X3 Disabled: Click here to have your XBOX reboot with the
X3 Modchip turned off. This saves you from having to get up, turn off your xbox,
wait 10 seconds, and turn it on holding down the power button to disable the
modchip.
-
- Index
<< Main BIOS Screen
BIOS Tools Screen >>
Copyright ©2005 Tor Nichols. All Rights Reserved.


